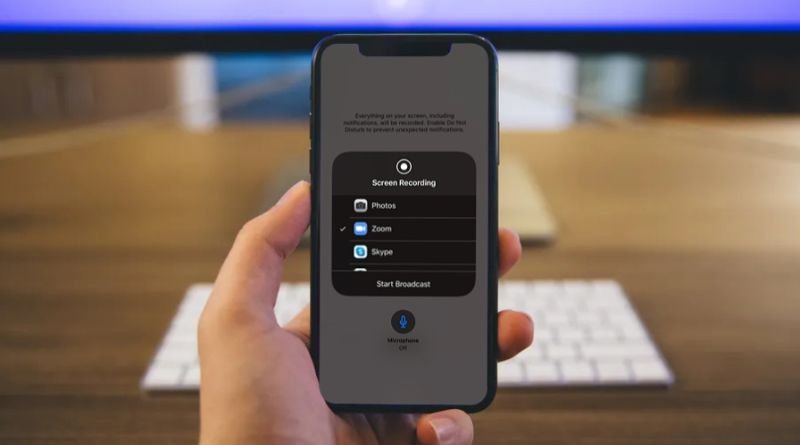
3 Simple Steps to Share Your iPhone or iPad Screen During a Zoom Meeting

If you have an iPhone or iPad that has the latest version of iOS installed, you can easily share your screen during Zoom meetings to show people what you’re doing or what you’re seeing. Here are three simple steps to follow to get your screen sharing ready for use during your next Zoom meeting! This guide also includes screenshots of each step so you can see exactly how it works, too!
Set up your iPhone or iPad
Before you can share your screen during a Zoom meeting, you need to make sure your iPhone or iPad is set up correctly. First, open the Settings app and tap Control Center. Next, tap Customize Controls and scroll down until you see Screen Recording. Tap the + next to it to add it to your Control Center. Now when you swipe up from the bottom of your iPhone or iPad’s screen, you’ll be able to start recording with just one tap. To stop recording, just press the Home button on your device and then stop recording from Control Center.
When you’re ready to start sharing your phone’s screen in a Zoom meeting, simply swipe up from the bottom of your device’s screen. If you want to pause recording, just press the Home button and then select Stop from Control Center. If someone else wants to share their screen with you during a Zoom meeting, go back to Control Center and select Add People for FaceTime or Video Chat. From there, click the plus sign next to Add Someone Else’s Device under Other Devices so that they show up on your list of devices.
Join the meeting
- Before joining a Zoom meeting on your iPhone or iPad, make sure you have the latest version of the app installed.
- Open the app and sign in, then tap the Join Meeting button.
- Enter the meeting ID provided by the host, then tap Join.
- You’ll be asked to join with video and audio enabled or disabled; choose whichever you prefer. If you’re using an iOS device that doesn’t support video, this will default to audio-only.
- After entering the meeting ID, you should see a notification asking if you want to give Zoom permission to access your camera and microphone as well as send voice messages during the call. Tap Allow for both so that everyone can see what’s happening on your screen during the call, or deny for one or both permissions if you don’t want them.
Get ready for the meeting
Before you start sharing your screen, there are a few things you need to do. First, make sure you’re using the latest version of the Zoom app. Second, open the app and join or start the meeting. Once you’re in the meeting, tap on the Share Screen icon.
From there, you have two options: share your entire screen or just a specific window. If you choose to share your entire screen, all of your apps and open windows will be visible to other participants. To see a specific window instead, click the drop-down menu in the top right corner of your screen and select which one you want to share. You can also change its size by clicking the buttons on either side of it until it’s big enough for everyone to see clearly. And if you have a lot going on that requires more than one screen, check out the Split View button in the bottom left corner. Tap this button to view two screens at once so both people in your meeting can see what’s happening.
You can even drag content from one window to another by holding down your finger until it lifts up and hovers over the target app. Click Done when you’re finished configuring the display settings and everything should look great! Now, we’ll dive into how to use our second option: Sharing only a Specific Window. The first thing you’ll want to do is find the app you want to share (for example, Notes). When you find it, click the Share Screen icon in the lower right corner of your screen. Next, click Only show this window in the upper left corner and then click Done again.


